


Position: HOME > Industry News > Fiber Laser Cutting Machines Operation Tips: Enhancing Cutting Accuracy
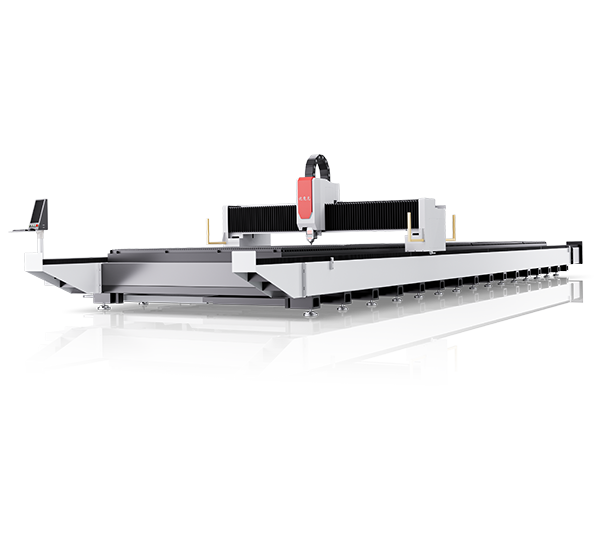
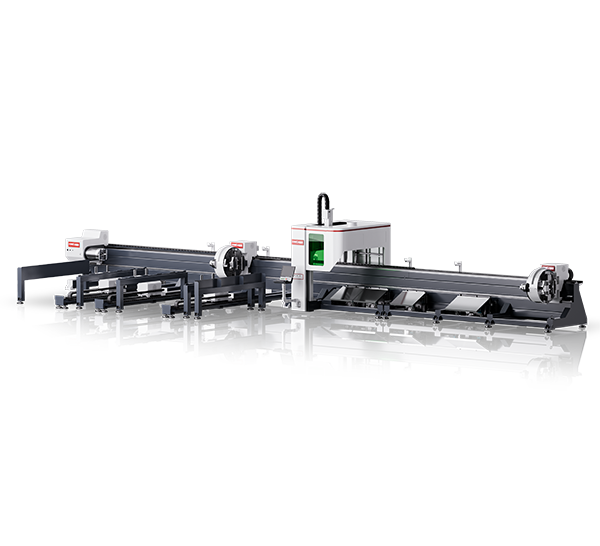
In the fields of metal processing and precision manufacturing, fiber laser cutting machines have become indispensable core equipment due to their efficiency, flexibility, and stable cutting quality. However, many enterprises find that while these machines perform exceptionally well, there is still room to improve cutting accuracy. The key lies in mastering operational details and optimizing processes. This article combines the characteristics of fiber laser cutting machines to share practical tips—from equipment calibration to process parameter adjustment—to help you maximize device potential and achieve millimeter-level cutting accuracy.

1. Equipment Calibration: The Foundation of Precision
The accuracy of fiber laser cutting machines depends first on their initial setup. Follow these calibration steps after startup:
1.1 Clean the Laser Head and Guide Rails
The laser head is the core component for beam output. Dust or metal debris on its surface may cause beam divergence or focal point deviation. Use a lint-free cloth dampened with isopropyl alcohol to wipe the laser head lens regularly. Simultaneously, inspect the lubrication of guide rails and gear racks to ensure smooth movement without jamming.
1.2 Initialize System Parameters
Access the "system self-check" function via the control panel to verify parameters like laser power, cooling system temperature (recommended: 20–25°C), and assist gas pressure (e.g., nitrogen, oxygen). For example, when cutting 2mm stainless steel, nitrogen pressure must stabilize at 15–18 bar; fluctuations exceeding 2 bar may cause slag adhesion.
1.3 Calibrate Focal Position
The focal point directly impacts cutting depth and quality. Use the built-in focal calibration tool to cut test blocks (e.g., 10mm carbon steel) and observe kerf width changes. Adjust the laser head height to position the focal point 0.5–2mm below the material surface (adjust based on thickness). This ensures the narrowest kerf and minimal slag.
2. Process Parameter Optimization: Precise Control of Cutting
Parameters for fiber laser cutting machines must be dynamically adjusted based on material type and thickness. Key optimization directions include:
2.1 Balance Laser Power and Cutting Speed
Excessive power or slow speed may overheat and deform materials, while insufficient power or high speed may fail to penetrate. Establish a material parameter library, such as:
Carbon steel (3mm): 1500W power, 18m/min speed, 500Hz frequency;
Stainless steel (5mm): 2000W power, 12m/min speed, 800Hz frequency.
Adjust parameters via test cuts to ensure smooth, slag-free kerfs.
2.2 Assist Gas Selection and Pressure Control
Nitrogen: Used for stainless steel and aluminum to prevent oxidation (pressure: 15–20 bar).
Oxygen: Suitable for carbon steel, leveraging oxidation to boost speed (pressure: adjust by thickness, e.g., 25 bar for 8mm carbon steel).
Air: Low cost but contains impurities; only for low-precision applications.
2.3 Pulse Frequency and Duty Cycle Adjustment
In pulsed cutting mode, frequency (Hz) determines spot overlap, while duty cycle (%) affects single-pulse energy. For thin plates (<2mm), high frequency (1000Hz) with high duty cycle (70%) reduces heat-affected zones. For thick plates (>8mm), low frequency (200Hz) and low duty cycle (40%) prevent material melting.
3. Material Handling and Fixation: Details Matter
3.1 Material Surface Pretreatment
Oil, dirt, or oxide layers on materials absorb laser energy, reducing accuracy. Clean materials with degreasers and sand oxidized areas. For highly reflective materials (e.g., aluminum, copper), apply laser-absorbing coatings (e.g., graphite) to enhance energy utilization.
3.2 Material Fixation Methods
Warped materials may cause laser head collisions or beam deviation. Use vacuum adsorption platforms for thin plates (<3mm) and electromagnetic chucks or clamps for thick plates (>5mm) to ensure flatness error <0.2mm.
4. Environment and Maintenance: Long-Term Accuracy Assurance
4.1 Environmental Factor Control
Temperature: Maintain 18–30°C to prevent laser power degradation from overheating.
Humidity: Keep relative humidity <70% to avoid lens condensation.
Vibration: Isolate machines from vibration sources (e.g., punch presses) and install anti-vibration pads if necessary.
4.2 Regular Maintenance Schedule
Daily: Clean waste bins and check gas pipeline sealing.
Weekly: Lubricate guide rails and inspect laser head coaxiality.
Monthly: Calibrate optical paths and replace cooling fluid.
5. Common Issues and Solutions
5.1 Slag Adhesion on Kerf
Causes: Focal point deviation, insufficient gas pressure, material surface oxidation.
Solutions: Recalibrate focus, increase gas pressure to standard levels, and pretreat material surfaces.
5.2 Inconsistent Kerf Width
Causes: Uneven laser head speed, degraded beam quality.
Solutions: Inspect servo motors and drive systems; clean or replace laser head lenses.
5.3 Material Deformation
Causes: Unreasonable cutting sequence, excessive heat input.
Solutions: Optimize cutting paths (e.g., edge-to-center) and reduce power or increase speed.
Conclusion
Enhancing the accuracy of fiber laser cutting machines requires a systematic approach, covering equipment calibration, parameter optimization, material handling, and environmental control. By mastering these tips, enterprises can significantly improve cutting quality, extend equipment lifespan, and reduce costs. In practice, combine specific materials and processing needs to establish standardized processes, and continuously refine your "precision enhancement plan" through test cuts and data recording.Fiber Laser Cutting Machines Operation Tips: Enhancing Cutting Accuracy
In the fields of metal processing and precision manufacturing, fiber laser cutting machines have become indispensable core equipment due to their efficiency, flexibility, and stable cutting quality. However, many enterprises find that while these machines perform exceptionally well, there is still room to improve cutting accuracy. The key lies in mastering operational details and optimizing processes. This article combines the characteristics of fiber laser cutting machines to share practical tips—from equipment calibration to process parameter adjustment—to help you maximize device potential and achieve millimeter-level cutting accuracy.
1. Equipment Calibration: The Foundation of Precision
The accuracy of fiber laser cutting machines depends first on their initial setup. Follow these calibration steps after startup:
1.1 Clean the Laser Head and Guide Rails
The laser head is the core component for beam output. Dust or metal debris on its surface may cause beam divergence or focal point deviation. Use a lint-free cloth dampened with isopropyl alcohol to wipe the laser head lens regularly. Simultaneously, inspect the lubrication of guide rails and gear racks to ensure smooth movement without jamming.
1.2 Initialize System Parameters
Access the "system self-check" function via the control panel to verify parameters like laser power, cooling system temperature (recommended: 20–25°C), and assist gas pressure (e.g., nitrogen, oxygen). For example, when cutting 2mm stainless steel, nitrogen pressure must stabilize at 15–18 bar; fluctuations exceeding 2 bar may cause slag adhesion.
1.3 Calibrate Focal Position
The focal point directly impacts cutting depth and quality. Use the built-in focal calibration tool to cut test blocks (e.g., 10mm carbon steel) and observe kerf width changes. Adjust the laser head height to position the focal point 0.5–2mm below the material surface (adjust based on thickness). This ensures the narrowest kerf and minimal slag.
2. Process Parameter Optimization: Precise Control of Cutting
Parameters for fiber laser cutting machines must be dynamically adjusted based on material type and thickness. Key optimization directions include:
2.1 Balance Laser Power and Cutting Speed
Excessive power or slow speed may overheat and deform materials, while insufficient power or high speed may fail to penetrate. Establish a material parameter library, such as:
Carbon steel (3mm): 1500W power, 18m/min speed, 500Hz frequency;
Stainless steel (5mm): 2000W power, 12m/min speed, 800Hz frequency.
Adjust parameters via test cuts to ensure smooth, slag-free kerfs.
2.2 Assist Gas Selection and Pressure Control
Nitrogen: Used for stainless steel and aluminum to prevent oxidation (pressure: 15–20 bar).
Oxygen: Suitable for carbon steel, leveraging oxidation to boost speed (pressure: adjust by thickness, e.g., 25 bar for 8mm carbon steel).
Air: Low cost but contains impurities; only for low-precision applications.
2.3 Pulse Frequency and Duty Cycle Adjustment
In pulsed cutting mode, frequency (Hz) determines spot overlap, while duty cycle (%) affects single-pulse energy. For thin plates (<2mm), high frequency (1000Hz) with high duty cycle (70%) reduces heat-affected zones. For thick plates (>8mm), low frequency (200Hz) and low duty cycle (40%) prevent material melting.
3. Material Handling and Fixation: Details Matter
3.1 Material Surface Pretreatment
Oil, dirt, or oxide layers on materials absorb laser energy, reducing accuracy. Clean materials with degreasers and sand oxidized areas. For highly reflective materials (e.g., aluminum, copper), apply laser-absorbing coatings (e.g., graphite) to enhance energy utilization.
3.2 Material Fixation Methods
Warped materials may cause laser head collisions or beam deviation. Use vacuum adsorption platforms for thin plates (<3mm) and electromagnetic chucks or clamps for thick plates (>5mm) to ensure flatness error <0.2mm.
4. Environment and Maintenance: Long-Term Accuracy Assurance
4.1 Environmental Factor Control
Temperature: Maintain 18–30°C to prevent laser power degradation from overheating.
Humidity: Keep relative humidity <70% to avoid lens condensation.
Vibration: Isolate machines from vibration sources (e.g., punch presses) and install anti-vibration pads if necessary.
4.2 Regular Maintenance Schedule
Daily: Clean waste bins and check gas pipeline sealing.
Weekly: Lubricate guide rails and inspect laser head coaxiality.
Monthly: Calibrate optical paths and replace cooling fluid.
5. Common Issues and Solutions
5.1 Slag Adhesion on Kerf
Causes: Focal point deviation, insufficient gas pressure, material surface oxidation.
Solutions: Recalibrate focus, increase gas pressure to standard levels, and pretreat material surfaces.
5.2 Inconsistent Kerf Width
Causes: Uneven laser head speed, degraded beam quality.
Solutions: Inspect servo motors and drive systems; clean or replace laser head lenses.
5.3 Material Deformation
Causes: Unreasonable cutting sequence, excessive heat input.
Solutions: Optimize cutting paths (e.g., edge-to-center) and reduce power or increase speed.

Conclusion
Enhancing the accuracy of fiber laser cutting machines requires a systematic approach, covering equipment calibration, parameter optimization, material handling, and environmental control. By mastering these tips, enterprises can significantly improve cutting quality, extend equipment lifespan, and reduce costs. In practice, combine specific materials and processing needs to establish standardized processes, and continuously refine your "precision enhancement plan" through test cuts and data recording.
2025-07-22
2025-07-21
2025-07-19